Photographing the 8/21 US eclipse using the Timelapse+ VIEW Intervalometer
Note: this document is a work-in-progress currently based on VIEW firmware version v1.8-beta5, and will be updated as testing continues and more resources are added.
The Timelapse+ VIEW Intervalometer is a powerful auto-ramping intervalometer, and the auto ramping algorithm is carefully designed to not respond to rapid changes, such as from car headlights and such. However, during the eclipse, the light conditions during totality will change very rapidly making the ramping algorithm non-ideal if you're in the path of totality (though it would be fine for just a partial eclipse).
So over the last few months I've been doing a bit of research and finally put together a special program specifically for the eclipse (actually a lot of the underlying code will be re-used for scheduled programming and long-term features in the near future).
The eclipse program won't do auto ramping during the eclipse, but rather just run pre-planned sequences at the right times as the eclipse events (circumstances) take place. This has the advantage of being determinate and you can preview the exact plan beforehand.
The VIEW uses Xavier M. Jubier's eclipse circumstances calculator for planning, used with permission graciously provided by Xavier. He also makes the incredibly extensive and powerful Eclipse Maestro software as well as an exposure calculator you'll want to refer to when planning the presets: http://xjubier.free.fr/en/site_pages/SolarEclipseExposure.html
Here's another exposure chart: http://www.mreclipse.com/SEphoto/image/SE-Exposure1w.GIF
This is also a good resource: http://www.nikonusa.com/en/learn-and-explore/a/tips-and-techniques/how-to-photograph-a-solar-eclipse.html
And be sure to check out Syrp's guide here: https://syrp.co.nz/community/news/definitive-guide-not-messing-your-solar-eclipse-time-lapse
The following circumstances are supported in the eclipse mode:
Pre-eclipse
This is the time leading up to the first contact. I recommend a preset fixed exposure with a solar filter on the lens (if you're using a telephoto lens). You'll be able to setup and test this exposure in the camera before starting the program. A 10 second interval or even more is probably good here (not much is happening unless there are clouds).
Partial (C1-C2)
This is the beginning of the eclipse. I recommend keeping the exposure the same as pre-eclipse and maintain an interval of around 10 seconds.
Baily's Beads (C2)
This is a very short period of about 15 seconds where the final bits of the sun are disappearing behind the moon. I recommend a short interval here of about 2 seconds, and no solar filter. This is where you need to be watching and remove the filter at this point.
Totality (C2-C3)
Having removed the filter during the Baily's Beads period right before this, the best setting here is to do HDR to capture the corona. Totality is very short -- only around 2 minutes and 20 seconds depending on where you are. You could do a couple long HDR sets of 11 exposures 1 stop apart, or several sets of 3 exposures 2 stops apart.
Baily's Beads (C3)
Now we start doing everything in reverse -- same as before this is a short period of about 15 seconds were you will want to be taking the images in rapid succession, then put the solar filter back on as the sun emerges again.
Partial (C3-C4)
Set this too the same as the first exposure and make sure the solar filter is back on.
Post-eclipse
Once the eclipse is over, you can set it to auto ramp or just keep going at a fixed exposure.
Note that if you're using a telephoto lens the range of light is much more extreme that if you're doing a landscape. With the landscape you should be able to do alright without a solar filter but you won't get the detail of what's happening with the sun.
I plan to run two cameras, one with a telephoto tracking the sun with a solar filter, and another wide-angle landscape that switches to auto-ramping after the eclipse and continues until night.
Here's how to test this feature before the eclipse:
Disable GPS (Settings->GPS Module) so you can enter manual coordinates
Find the coordinates on Google Maps of where you plan to be, and enter them in Settings->Set GPS Latitude/Longitude
Change the date to 21 Aug 2017 in Settings->Set UTC Date
Set the time to a little before first contact: 16:00:00 in Settings->Set UTC Time (then check Information->Eclipse Info to verify)
Go to Time-lapse and set Timelapse Mode to 'eclipse'
Configure your settings for each part of the eclipse in Eclipse Circumstances
Check Review Program to see the planned events and settings
START the time-lapse and see how it goes!
One way to verify the timing is to use Eclipse Maestro (Mac) or Eclipse Orchestrator (Windows) preset to the same location and time as the VIEW, and then point the camera at the computer screen to simulate the eclipse.
Note: if you're using non-current time or location settings other than the actual location, the sun tracking feature will not work. That will need to be tested separately with the current time and actual location set properly.
If you don't have the VIEW Intervalometer but still want to automate photographing the eclipse, try Eclipse Maestro (Mac) or Eclipse Orchestrator (Windows) from a laptop.
Tracking the sun
If you're using a telephoto lens, you'll need some way to keep the sun in the frame. There are a few options for this:
Reposition the camera every couple minutes
Use a polar-aligned astronomical tracker (this is ideal, but hard to align during the day)
Use pan-head aligned with the north star (hard to do during daytime) and set it to turn at 15°/hour
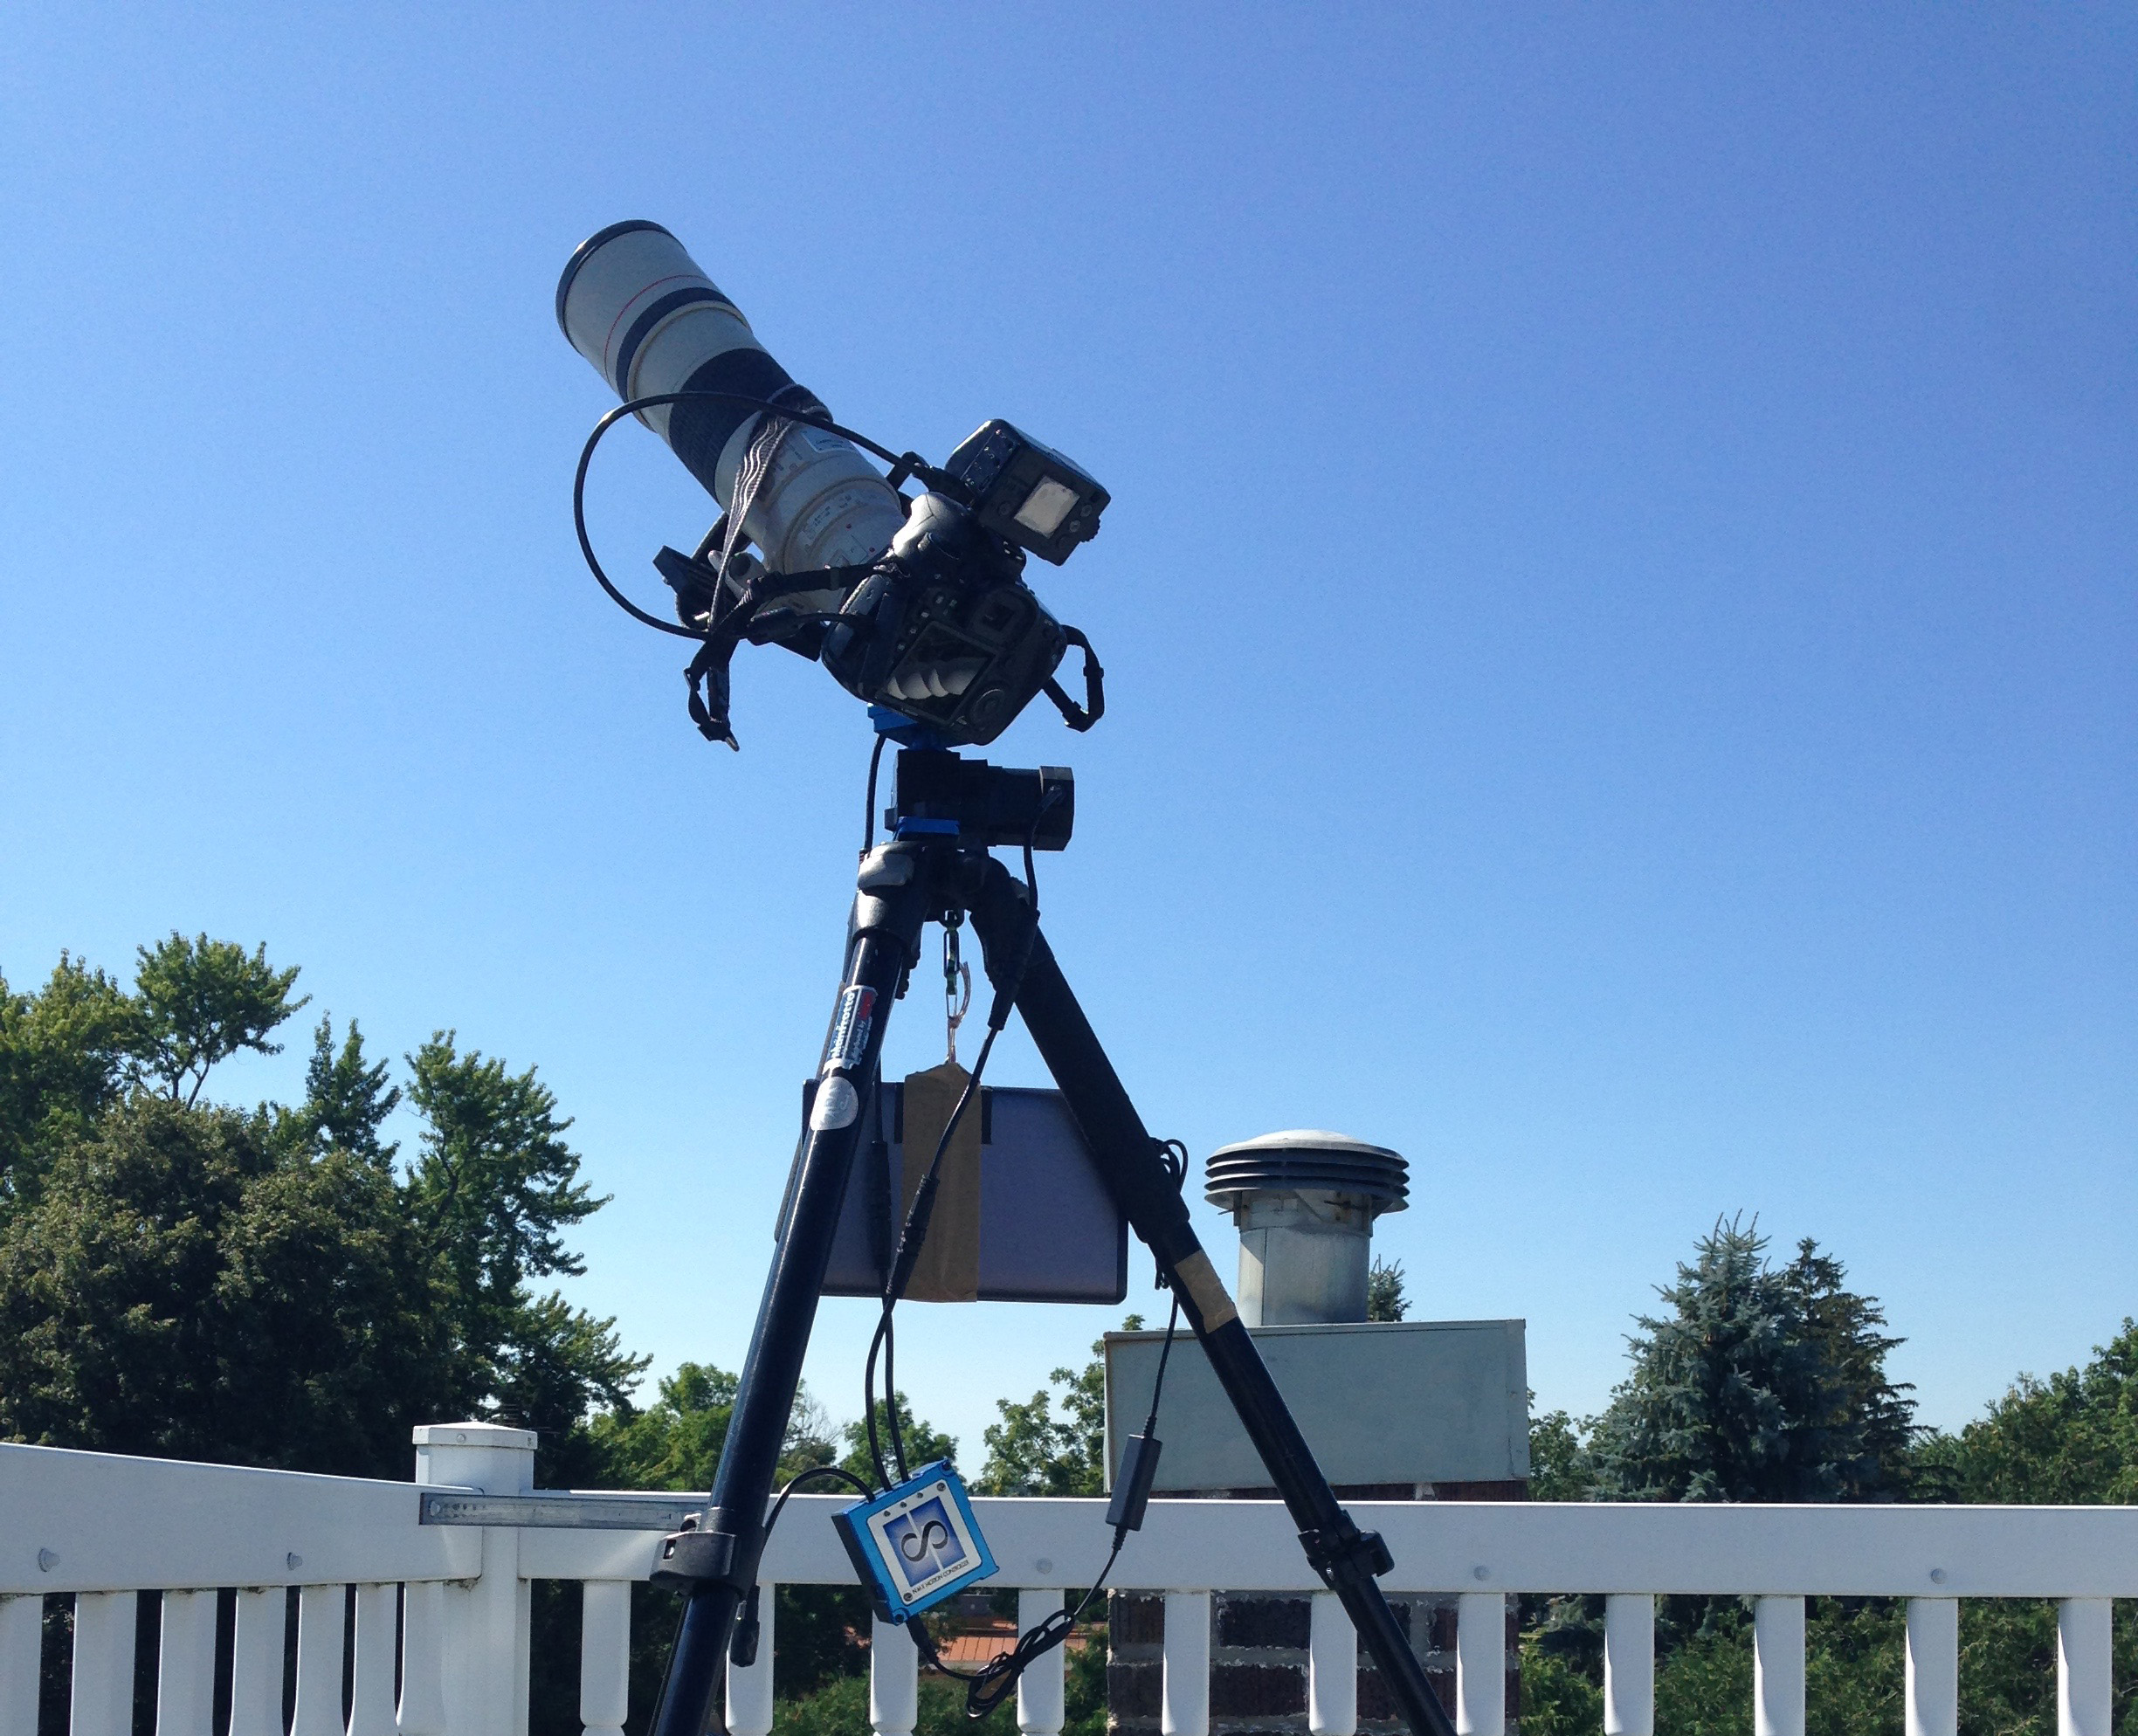
Use a 2-axis pan/tilt NMX or Genie Mini system and use the VIEW's sun tracking feature.
Obviously, of the above options, I'll be covering #4 here -- tracking the sun with the VIEW. A couple things to note about a pan/tilt head vs a polar aligned system is that the pan/tilt head only needs to be level; you don't need to worry about polar alignment. Secondly, the camera frame will remain level during tracking, in contrast to a polar aligned axis where the frame will tilt according to the stars (which if you're doing stars, this is what you want). But the pan/tilt can be nice if it ends up including the horizon at some point, it's nice for it to show up at the bottom instead of a corner of the frame. Also, at present, this method only supports shoot-move-shoot, so long exposures with a telephoto aren't recommended (up to 1 second is probably ok during totality).
The VIEW calculates the position of the sun based on the current coordinates and time, so as long as the sun is in the frame when it starts, it will continue moving the pan and tilt according to the relative change in the azimuth and altitude of the sun.
To enable solar tracking, make sure you either have a VIEW with a GPS or manually enter the exact coordinates, time and date in settings, connect the NMX or Genie Minis and then you'll find the Tracking option available in the Time-lapse menu. You'll also need to select a motor for each axis (-R means reverse).
Or, you can use the app via wifi to set it up from your phone, using the joystick mode and live view to find the sun initially. Then just select "sun" in the tracking section of the time-lapse setup screen. Be sure to configure the motors so that the left/right up/down of the joystick is correct.
Tracking isn't perfect. There are many factors to proper tracking, including an exact GPS position and accurate time, as well as a level tripod (the pan axis should be perfect the level and the tilt axis at exactly 90° off the pan axis). Heavy cameras can cause the head to flex as the weight shifts around, adding to the inaccuracy. Additionally, backlash can cause a significant amount of error on the tilt axis since if you're starting spanning noon, the tilt will reverse direction and loose some steps due to the spacing between the gears. If you're using a 200mm lens, none of these things should be too significant, but for 400mm or more, it can be hard to keep the sun in the frame for more than an hour. Be sure to test this beforehand!
Disclaimer and word of caution
This is my first total eclipse and I'm quite excited about it, but I obviously don't have first-hand experience. If you take my advice in any of this and plan to use the VIEW, please throughly test it before hand so you can be confident in it yourself and not just take my word for it. I'm just doing what I can from research and putting this plan together for myself, and want to share it with others to be of help but you'll need to thoroughly test it and be confident in the process on your own. I can't be responsible for ruining someone's once-in-a-lifetime event!
Also, I strongly recommend to manually run one camera in case something does go wrong.
Another thing to consider is compounding the probabilty of failure -- the more things you're dependent on, the more the likelyhood of something going wrong. For example, if the camera, the VIEW, and motion controller, and the power supply each have a 3% chance of failure (just making up this number), when you put them all together you now have an 11% chance of something in the setup failing (1-(1-0.03)^4).